Introduction to Drawing a Baseball Cap
How to draw baseball cap? Drawing a baseball cap can be a fun and rewarding project. Whether you are an aspiring artist or simply someone who enjoys casual sketching, mastering the art of drawing a baseball cap requires understanding its basic shape and structure. This guide will provide you with essential tips on how to draw a baseball cap effectively. We’ll look at the essential materials you need and move through detailed steps and techniques. By the end of this guide, you’ll be able to sketch a baseball cap with confidence, capturing its unique features with skill.

Materials Needed for Cap Sketching
Before you begin the process of sketching a baseball cap, gathering the right materials is crucial. Here’s what you will need:
- Pencil: A good-quality graphite pencil is essential for sketching. Choose a medium hardness pencil, such as HB or 2B, which provides flexibility and depth in shading.
- Eraser: An eraser is vital to rectify mistakes and refine edges. A kneaded eraser is recommended for its flexibility and minimal residue.
- Sketch Paper: Use a thick, smooth sketch paper that can handle erasing and sketching without tearing. A paper weight of about 90-120 gsm is ideal.
- Ruler: A ruler can help in maintaining the correct proportions and straight lines, especially for the brim of the cap.
- Colored Pencils or Markers (optional): If you plan to add color to your sketch, have a set of colored pencils or markers on hand.
- Blending Stumps: For smooth shading and blending, blending stumps or tortillons are excellent tools.
Having these materials ready will not only prepare you for the task ahead but also ensure a smoother and more enjoyable drawing experience. Ensure you have a comfortable workspace to begin your sketching.
Analyzing the Shape and Proportions of a Baseball Cap
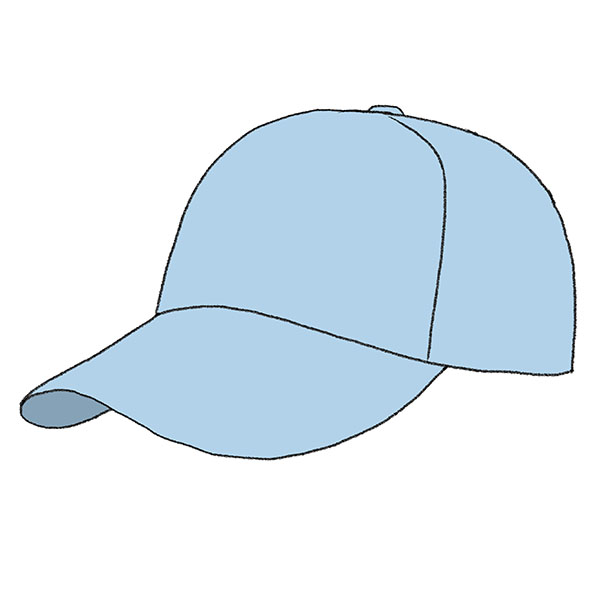
Before diving into sketching, it’s important to understand the baseball cap’s unique shape and proportions. A baseball cap generally consists of a rounded crown and a flat or curved brim. Here’s how to analyze these features for your drawing:
- Crown Shape: Notice the dome-like structure of the crown. It’s wider at the bottom and narrows slightly towards the top.
- Brim: Look at the brim’s length and curve. It should be symmetrical and extend outwards from the base of the crown.
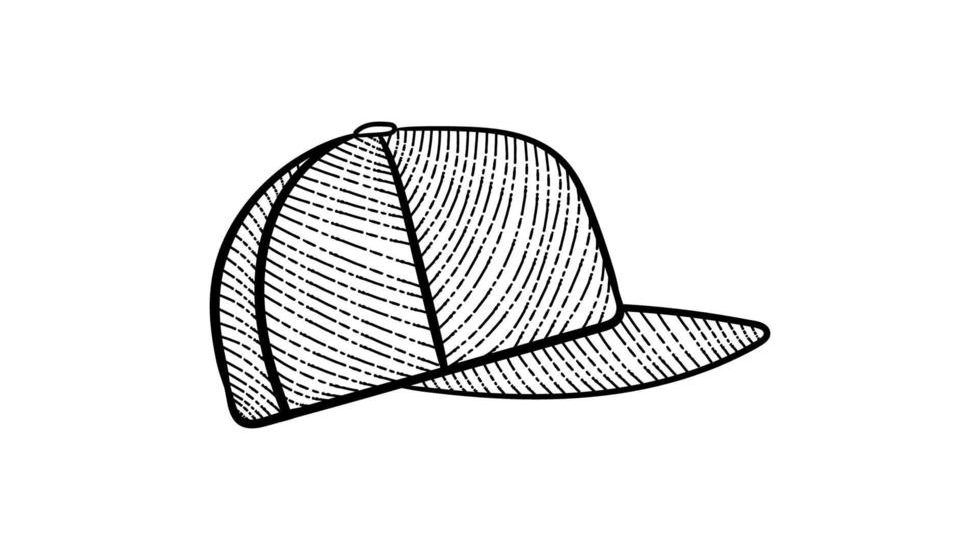
- Cap Panels: Baseball caps often have six sections, or panels, that form the crown. Note how they join at the cap’s peak.
- Button and Eyelets: Most caps have a button at the top and eyelets for ventilation. Observe their placement and size.
Getting the proportions right from the start can make a big difference in the accuracy of your sketch. Spend some time studying different baseball caps. Pay special attention to the way the brim attaches to the crown and how the panels shape the cap’s form. If possible, have a real cap in front of you as a reference. This will help you capture the true essence of a baseball cap in your drawing.

Step-by-Step Process: Outlining the Cap
Now that you have your materials at the ready and understand the cap’s structure, let’s start sketching. Here is a step-by-step process to outline your baseball cap:
- Draw the Crown: Begin by sketching a half-oval to form the top part of the cap’s crown. Ensure it is slightly flattened on top.
- Add the Brim: From the bottom of the crown, extend a curved line outward to create the brim. It should be a shallow arc shape.
- Create Cap Panels: Draw light lines from the crown’s top down to the base, dividing the half-oval into equal sections for the panels.
- Sketch the Button: Place a small circle at the crown’s peak. This is where the panels converge.
- Outline the Button and Brim Details: Outline a band wrapping the base of the crown, representing where the brim attaches. Add another small circle for the hole in the brim, if visible.
- Refine the Shape: Adjust any lines as needed to capture the correct proportions and symmetry of the baseball cap.
- Draw the Eyelets: Add small circles around the crown for the eyelets, usually found on the panels’ edges.
- Erase Extra Lines: Clean up your sketch, removing any unnecessary guide lines with your eraser, refining the cap’s outline.
Follow these steps to get an accurate outline of the baseball cap, paving the way for adding details and textures. Remember to sketch lightly as heavy marks are hard to erase. Take your time, and don’t rush the process. Keep checking your reference cap to ensure accuracy in your drawing.
Adding Details and Textures to Your Baseball Cap Drawing
After outlining your baseball cap, it’s time to add life to it with details and textures. This stage involves enhancing the basic sketch to make it look more realistic. Here’s how you can do it:
- Cap Panels Texture: Each panel on the cap has a subtle texture. Use light, directional strokes to suggest the fabric’s weave pattern.
- Brim Details: For a curved brim, add a thin line along the bottom to show its thickness. Sketch light lines across the brim to indicate its curved shape.
- Stitching and Seams: Baseball caps often have visible stitching. Draw these with short, dashed lines along the panel edges and brim.
- Logo or Emblem: Most caps have a logo on the front panel. If you’re adding one, sketch it lightly and define its edges clearly.
- Eyelets and Button: Make the eyelets stand out with darker shading around them. For the button, add a shadow underneath to give it depth.
- Adjust the Outline: Revisit the overall shape and make adjustments to any areas that need refinement for a more accurate depiction.
These steps will help you to create a drawing that looks close to a real baseball cap. Remember to keep checking the actual cap or a reference photo to guide your work. When adding details, the key is subtlety, so keep your strokes light and build up the texture gradually. Keep in mind the placement of lights and shadows as they contribute significantly to the realism of your drawing.
Shading Techniques for Realistic Effects
When you reach the shading stage, that’s when your drawing truly comes to life. Here are some simple shading techniques to add realistic effects to your baseball cap sketch:
- Identify Light Sources: Decide where the light source is. Shades will appear on the opposite side.
- Layering: Start with light layers of shading and gradually build up to the dark areas. This allows for more control over the tone.
- Blending: Use a blending stump to soften the pencil lines. This creates smooth transitions between light and dark areas.
- Shadow Area Details: Pay more attention to shadowed areas. Subtle changes in shading can depict the depth and curve of the cap.
- Highlight the Brim: Often, the brim will catch more light. Use lighter shading here to represent this.
- Texture Shading: For the fabric texture, use consistent but subtly varied strokes to imply the fabric’s weave pattern.
- Refining Edges: Go back to the edges after shading and define them with a sharp pencil if they’ve gotten blurry.
- Contrast: Ensure there is good contrast between light and dark to make your drawing pop.
Through these simple steps, you will give your baseball cap drawing the realistic look that stands out. Keep practicing these techniques, and you’ll see significant improvements in your sketches.
Tips and Tricks for Perfecting Your Baseball Cap Sketch
To bring your baseball cap sketch to the next level, keep these practical tips in mind:
- Use Light Strokes: Start with light pencil strokes. You can always darken them later.
- Observe Real Caps: Study a real cap’s form and shadows for accuracy.
- Take Breaks: Step back regularly to view your work from a distance.
- Avoid Smudging: Place a paper under your hand to prevent unwanted smudges.
- Use References: Keep reference images handy to maintain consistent proportions.
- Practice Symmetry: Pay attention to the cap’s symmetry, especially the brim.
- Patience is Key: Take your time with each step, especially while adding details.
- Shade Gradually: Build up shading slowly to control the depth and realism.
- Highlight Strategically: Leave areas white to represent light reflecting off the cap.
- Contrast for Depth: Use contrast in shading to give your cap a three-dimensional feel.
Remember, practice improves skills. Keep sketching different styles of baseball caps. With each attempt, your technique will enhance, and soon you’ll be drawing baseball caps with ease and confidence!
Finalizing Your Drawing: Review and Touch-ups
As you near the end of your baseball cap sketch, it’s time for final review and touch-ups. This phase polishes your drawing, making it as close to perfect as possible. Here are the steps to follow:
- Review the Proportions: Look over your drawing one more time. Check the cap’s symmetry and proportions. Make sure all parts look correct.
- Clean Up Lines: Use your eraser to clean up any smudges or stray marks. Clear lines give a neat and professional finish.
- Reinforce Shadow: Add a final layer to your shadows if needed. This can help deepen the effect of depth and roundness.
- Enhance Highlights: Identify areas that should be lighter. Use your eraser gently to bring out highlights or bright spots.
- Refine Textures: Go over the fabric textures again. Make sure they are even and consistent across the cap.
- Add Final Details: Include any small details you might have missed. Look at logos, stitching, and other tiny elements.
- Contrast Check: Ensure you have a good balance between light and dark. This contrast will make your cap stand out more.
- Step Back and Assess: Take a step back from your drawing. Viewing from a distance can help you see the overall effect.
Remember, the goal is to capture the realism and essence of how to draw a baseball cap. Taking the time for review and touch-ups will ensure your sketch looks its best. Keep practicing and apply these steps to keep improving your art!


