Getting Started
Gathering Your Materials
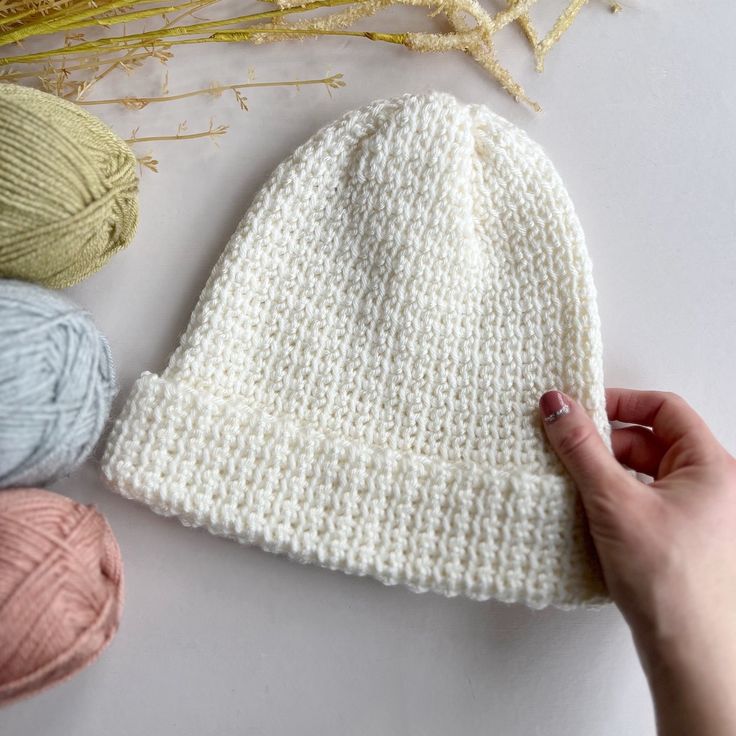
How to Crochet a Hat?Before you begin crocheting a hat, you’ll need to gather the necessary materials. The most essential items include yarn, a crochet hook, a yarn needle, and scissors. Choose a yarn that’s soft, comfortable, and appropriate for the season you intend to wear the hat. The yarn’s label should recommend the hook size to use, but as a general rule, thicker yarn will require larger hooks. Additionally, having a stitch marker can be helpful to mark the start of your rounds, as most hats are worked in the round.
Understanding Crochet Basics
Before diving into hat-making, it’s crucial to have a grasp of basic crochet stitches. If you’re just starting, practice making slip knots, creating a foundation chain, and executing single and double crochet stitches. Once comfortable, try working in the round, which is the typical structure for crocheting hats. You should also learn how to increase and decrease stitches, as these techniques are important for shaping your hat. There are plenty of tutorials and resources available that offer step-by-step instructions for these fundamental skills.

Reading a Crochet Pattern
Patterns are the blueprint for your crochet projects. As a beginner, look for simple patterns to make a basic hat. Patterns will provide you with a guide on stitch types, how many stitches per round, and when to increase or decrease. Understanding crochet pattern abbreviations is essential; for example, “sc” stands for single crochet, “dc” stands for double crochet, and “st(s)” means stitch(es). Familiarize yourself with these terms and practice following patterns before attempting your first hat.
Crocheting Your Hat
Starting Your Hat
Initiating your crochet hat begins with creating a slip knot on your hook and crocheting a series of chains to form a ring – this will be the top of your hat. Alternatively, you can use the magic ring method, which is popular for hats as it allows the ring to be tightened completely, leaving no hole at the top. Once the foundation circle is ready, you will work in rounds to build up the sides of the hat. Make sure your initial rounds are snug but not too tight.
Building the Body of the Hat
As you continue to work in rounds, you’ll see the body of the hat take shape. Follow your pattern to know when to increase your stitches to gradually widen the hat. This is usually done by crocheting two stitches into one stitch from the previous round. After the increases, continue to crochet around without further increases to create the sides of the hat. The number of rounds required will depend on the size of the hat you’re making and the desired slouch or fit you prefer.
Finishing the Hat
When your hat reaches the desired length, it’s time to finish it off. The final step often involves a few decreases to taper the hat for a snug fit around the head. After completing the last round, cut the yarn, leaving a long tail for weaving in ends. Thread your yarn needle with this tail and weave it through the remaining stitches, pulling it tight to close the top of the hat if needed. Weave in any other loose ends for a polished finish. You can also add a border of single or double crochet stitches around the hat’s edge for a clean and stretchy brim.

Personalizing Your Creation
Adding Texture and Color
You can personalize your hat by adding textured stitches such as the bobble or puff stitch for a unique touch, or using a variety of colors to create stripes or color blocks. Remember that changing colors in crochet requires you to finish the last yarn-over of a stitch with the new color. Experiment with different stitch patterns and color combinations to make each hat uniquely yours.
Embellishments and Appliqués
Another way to customize your hat is by adding embellishments or appliqués. After completing your hat, you can sew on items like buttons, bows, or flowers for a playful or stylish accessory. Appliqués can be anything from simple shapes like hearts or stars to complex figures like animals or letters. Crochet them separately and then attach them securely to the hat with the same or a contrasting yarn for an extra pop of personality.
Caring for Your Handmade Hat
Finally, take good care of your handmade hat to keep it looking its best. Read the yarn label for washing instructions—most hats can be gently hand-washed in cool water with a mild detergent. Lay it out flat to dry, reshaping it as needed to maintain its form. Avoid hanging to dry, as gravity can stretch out the fibers and distort the shape of the hat. With proper care, your crochet hat will remain a cozy and stylish part of your wardrobe for many seasons.
Preparing for the Wash
Reading the Label and Choosing the Right Method
Before washing any hat, check the label for specific care instructions. Some hats can go in the washing machine on a gentle cycle, others require hand washing, and some may be dry clean only. Materials like cotton or polyester usually withstand machine washing, while wool, silk, and certain blends might need a more delicate touch. If there’s no label, decide based on the hat’s material and sturdiness. Knowing how to proceed will ensure you clean your hat effectively without causing damage.
Spot Cleaning for Minor Stains
For minor stains or dirt, spot cleaning is often enough to refresh your hat. Use a clean cloth or soft brush dipped in a mixture of mild detergent and water to gently scrub the stained area. Avoid using harsh chemicals or bleach, as these can ruin the color and integrity of the fabric. Once the stain lifts, rinse the area with another clean, damp cloth to remove any soap residue. Allow the hat to air dry completely before wearing it again.
How to clean a knitted hat? Here are some tips on how to clean a hat.
Washing Techniques
Hand Washing for Delicate Hats
Hand washing is the safest method for most hats, especially if they’re made from delicate materials or have a structured shape. Fill a sink or basin with cool or lukewarm water and add a gentle detergent. Submerge the hat and let it soak for up to an hour, gently agitating the water to remove dirt. Rinse thoroughly with clean water to prevent soap buildup. Press out the excess water without wringing, which can distort the shape.
Machine Washing for Durable Hats
If the hat’s label indicates it is machine washable or if it’s clearly sturdy enough (like a baseball cap), proceed with the washing machine. To protect your hat, place it inside a laundry bag or pillowcase and wash it on a gentle cycle using cool water with a mild detergent. Secure the bag to prevent the hat from tumbling freely. Consider washing the hat alone or with similar items to avoid crushing it under heavier garments.
Drying and Reshaping
Air Drying to Preserve Shape and Size
After washing your hat, always air dry it to preserve its shape and size. Lay it on a clean towel away from direct sunlight and heat sources, which can cause fading and shrinkage. You can stuff the inside with a towel or paper to help the hat retain its shape while drying. Turn the hat every few hours to ensure it dries evenly. Never use a dryer as the heat can distort the hat’s shape, shrink it, or damage its material.
Storing Your Hat Properly
Once your hat is completely dry, store it in a cool, dry place. Use a hat stand or a hook to keep it from getting crushed, or lay it flat, ensuring the brim and crown aren’t bent out of shape. Avoid storing hats in plastic bags or containers that can trap moisture, leading to mildew or odor. If you must stack your hats, place some tissue paper in between to maintain their shapes and prevent color transfer.
Crafting a crochet hat is a fun and rewarding project. Starting simple with the right materials and understanding basic crochet techniques sets a solid foundation. Building the hat in rounds and completing it with finesse adds to the joy of creating something by hand. Personalizing your hat through colors, textures, and embellishments allows you to express your creativity and style. While doing all this, remember that practice and patience are key to perfecting your craft. Happy crocheting!